HEALTH-GREYHOUNDS ARE DIFFERENT: Happy Tails
|
Happy Tails are not so happy.
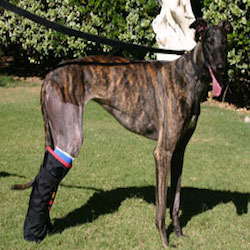
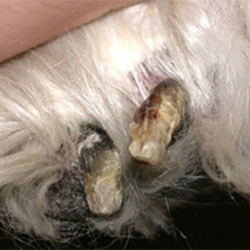
Greyhounds have long, skinny, bony tails without much flesh or fur to protect them. They also have a tendency to swing or whip their tails around wildly when happy. This enthusiastic tail wagging can lead to what is commonly called “happy tail”. Happy tail, though a cute and descriptive name, is not a satisfying event for the greyhound or the walls or even ceilings of your house, car or even the vet’s office. The big problem with happy tail is that you HAVE to get it covered and padded so that the wound can heal. The bandage needs to be loose enough not to damage the tail further and snug enough to stay on a fast moving tail. Another big problem is that adopters sometimes become so frustrated about bandaging the tail and the blood on the walls that they give in to the urge to have the tail shortened. That is often not all that successful. The vet will want to remove 3 or 4 tail joints to have enough skin to cover the tip of the tail, which are several inches. And even after the surgery the tail can easily get re-injured or the end can die if not properly bandaged. Then the grey is back for more surgery and less tail! Some vets just prefer to give them very short tails the 1st surgery. I always feel very sorry for those greyhounds, as they were not meant to have 4 or 5” tails. So please try to be creative and save the tail!! GreySave volunteers and our best “tail saving” vets have used several methodologies depending on where the wound is. The 1st methodology is one I have not seen written up anywhere. This methodology is for when the wound is on or near the end of the tail. If the wound is on the end you have an advantage with this method since you can get it protected plus easily apply meds to it without re-wrapping. First, you need a lightweight plastic syringe case that is just a bit wider than your grey’s tail after it has a couple thin layers of gauze on it. You will need it opened on both ends so you probably will have to cut off one end. Other items you will need are tape that will stick to the fur, a roll of gauze wrap, vet wrap and a product like EMT Gel, EMT Spray or a topical antibiotic. To wrap the tail you use the sticky tape and cut off a long strip of tape. This tape should probably be at least 8 or 9 inches long. Lay 5” up along the tail and press it to the fur. Extend the other 3 or 4” past the tip of the tail making sure it does not stick to anything it should not. Put a couple layers of the gauze on the tail to lightly cover the tape but not the wound. Slide the syringe case over the tail, tape & gauze. Leave the larger syringe opening at the tail tip end and extend it slightly past the tail tip. This will protect the wound when the tail next flies. Use the remaining 3 or 4” of the tape to go up the syringe case on the outside and secure the syringe case to the tail. Cover the syringe case and sticky tape with vet wrap. Make sure to go up past the top of the syringe case so it is well attached to the greyhound. Don’t make the vet wrap so tight it cuts off the tail’s circulation. Next re-apply some ENT Gel, EMT Spray or a topical antibiotic to the wound. If you can’t get a syringe case from a local vet then look around the house for cylindrical lightweight household objects like old fashioned plastic hair rollers or even the foam padding used to protect water pipes. This is a job for creativity!! If the wound is mid-tail or if you want to try a different wrapping technique there are several Happy Tail articles out on the Internet. Use whatever works to save the tail!! http://www.ngap.org/tales-about-tails-y536.html http://www.instructables.com/id/Happy-Tail-Solution/ http://www.grassmere-animal-hospital.com/happy_tail_bandaging.htm |

